Peeling away old wallpaper can feel like unearthing a time capsule filled with questionable design choices and sticky memories. Whether it’s the floral patterns that scream 1980s or the bold colors that seemed like a good idea at the time, it’s time to bid farewell to those outdated walls.
Preparing for Removing Old Wallpaper
Preparation plays a crucial role in the process of removing old wallpaper. Determining the right approach depends on understanding the type of wallpaper and gathering necessary tools.
Assessing the Wallpaper Type
Identifying the wallpaper type significantly influences removal techniques. Strippable wallpaper allows for easy peeling, while vinyl wallpaper often requires moisture for effective removal. Traditional paper wallpaper may necessitate a specific solution to loosen its adhesion. Determine whether the wallpaper has been painted, as this affects removal methods. Knowing these differences aids in selecting suitable techniques and ensures a smoother process.
Gathering Necessary Tools and Supplies
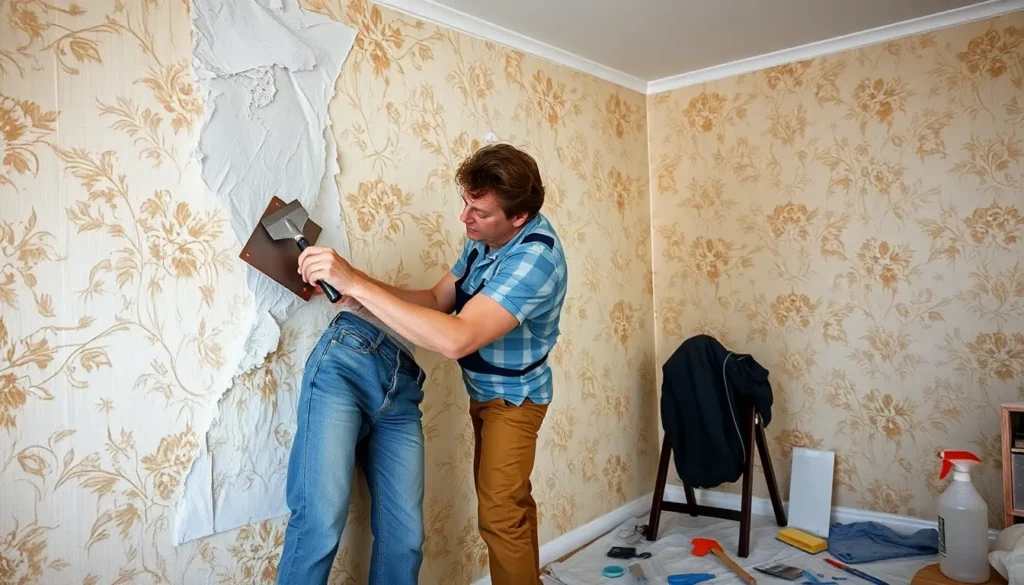
Collecting the right tools ensures efficient wallpaper removal. Gather a wallpaper scraper or putty knife for peeling. A spray bottle filled with warm water helps to soften adhesive on stubborn sections. Use a sponge to apply removal solutions for moisture-sensitive wallpapers. Keep a bucket handy for any debris collected during the process. A drop cloth protects the floor from damage, while gloves offer hand safety. These items contribute to a well-organized removal effort.
Techniques for Removing Old Wallpaper
Removing old wallpaper involves various techniques tailored to specific wallpaper types. Selecting the right method accelerates the process and enhances efficiency.
Using Steam
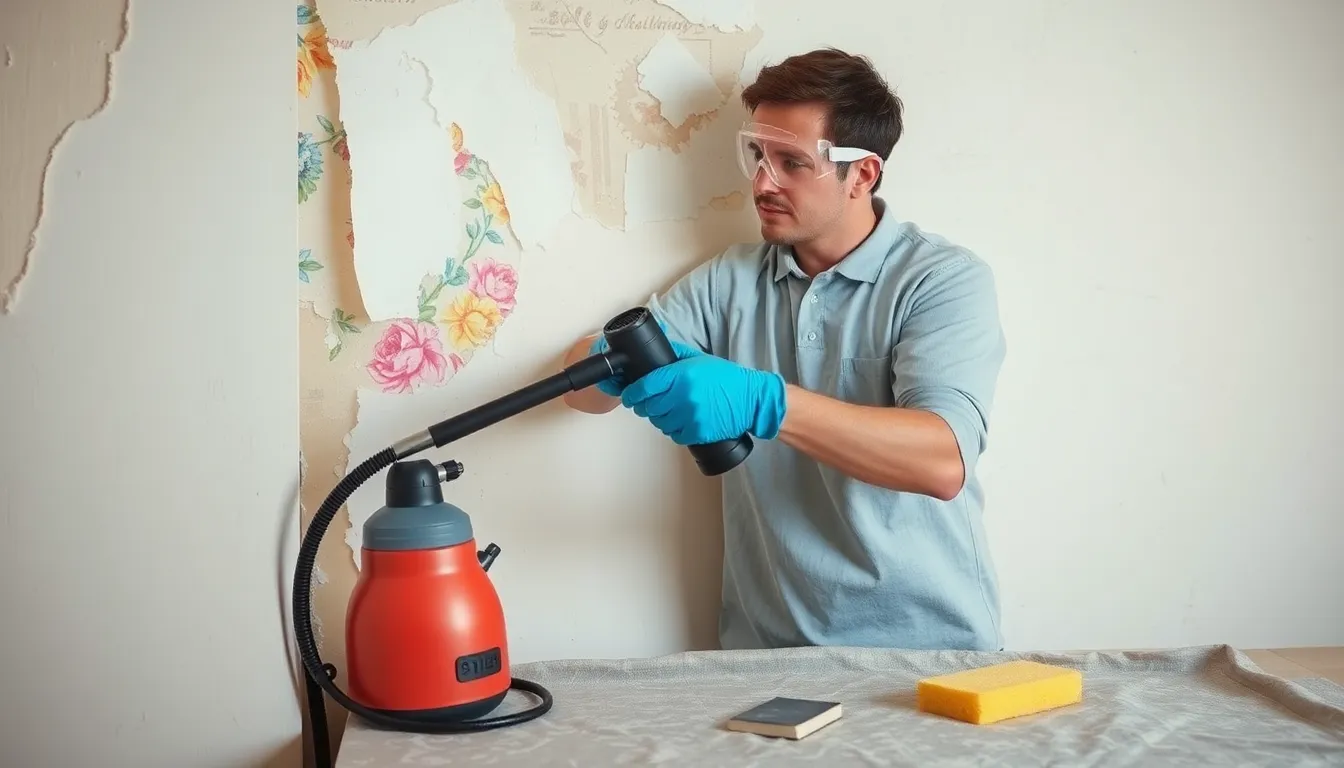
Steam removes wallpaper effectively by loosening the adhesive. A steam wallpaper remover generates hot steam that penetrates the paper, making it easier to peel away. Starting from the top, workers should aim the steam nozzle at the seam. After applying steam, a wallpaper scraper helps lift the paper from the wall. Patience during this process allows for a cleaner removal, minimizing damage to the wall underneath. Some may find this method particularly effective with vinyl and traditional paper wallpapers.
Applying Solutions
Applying solutions softens the adhesive on wallpaper for easier removal. Combining warm water with vinegar or a commercial wallpaper removal solution often yields favorable results. Spraying the mixture onto the wallpaper saturates it, helping to break down the glue. Waiting for about 15 minutes allows the solution to penetrate before attempting to peel away the paper. Using a sponge aids in distributing the solution evenly and removing residual adhesive. When applied carefully, this technique works well on various wallpaper types, providing a thorough approach to transformation.
Tips for a Successful Removal
Preparation and method play significant roles in removing old wallpaper. Following these tips can streamline the process and enhance results.
Working in Sections
Focus on manageable areas rather than attempting to remove all wallpaper at once. Divide the wall into sections, working from top to bottom. Conquer one section completely before moving to the next, ensuring thoroughness with every step. This systematic approach prevents overwhelming the removal process and helps maintain consistency in techniques used.
Dealing with Stubborn Adhesive
Encountering stubborn adhesive is common during wallpaper removal. If adhesive lingers, applying an adhesive remover can provide relief. Soaking the area with a solution of warm water and vinegar often breaks down the residue effectively. Patience is essential; giving the solution time to act allows easier removal. A plastic scraper can help lift remaining adhesive without damaging the wall surface. Additionally, using a sponge to gently scrub can effectively eliminate tough spots where adhesive clings.
Aftercare for Walls
After removing old wallpaper, proper aftercare ensures walls look fresh and ready for a new finish.
Cleaning the Surface
Cleaning the wall surface is essential after wallpaper removal. Start by wiping down the area with a damp sponge to eliminate dust and leftover adhesive. Next, use a mixture of warm water and mild soap for any stubborn spots. Scrubbing gently helps remove residual paste without damaging the wall. Rinse the sponge frequently to keep it clean. Ensure thorough drying to prevent future moisture issues. This step prepares the wall for painting or new wallpaper, enhancing overall aesthetics.
Repairing Damages
Addressing any damages is crucial for achieving a smooth, professional finish. Inspect the walls for holes or dents that require attention. Use spackle or joint compound to fill these imperfections, smoothing the surface with a putty knife. Sanding the area lightly once it dries ensures a flush surface. Prioritize larger repairs to create a solid base for new coatings. Apply a primer over the repaired areas for better paint adhesion. Taking these actions reinforces a polished appearance for the newly finished walls.
Removing old wallpaper can be a transformative experience that breathes new life into a space. With the right preparation and techniques in place, anyone can tackle this project effectively. Understanding the wallpaper type and using appropriate tools ensures a smooth removal process.
After successfully stripping the walls, proper aftercare is essential to achieve a flawless finish. Cleaning the surface and addressing any imperfections lays the groundwork for a fresh coat of paint or new wallpaper. By following these steps, it’s possible to create a beautiful and inviting environment that reflects current design preferences. Embracing change can lead to a more enjoyable living space.