Table of Contents
ToggleSeeing a bathroom renovation before and after comparison is like watching a magic trick unfold, except the sleight of hand involves grout saws, tile nippers, and a lot of planning. These transformations aren’t just eye candy for your Pinterest boards. They’re roadmaps. They show what’s possible within different budgets, layouts, and skill levels. Whether someone’s wrestling with a cramped half-bath or dreaming of a spa-worthy retreat, before-and-after photos reveal the strategic choices that turn outdated spaces into functional, beautiful rooms. This article breaks down 15 real-world bathroom makeovers, budget-friendly flips, small-space solutions, luxury upgrades, and the hard-won lessons hidden behind the glossy afters.
Key Takeaways
- Before and after bathroom renovation photos serve as educational roadmaps that reveal layout decisions, material choices, and budget strategies without requiring expensive structural overhauls.
- Budget-friendly bathroom makeovers focusing on paint, fixture swaps, affordable tile alternatives, and lighting upgrades can deliver stunning results for under $500–$800 in materials.
- Small bathroom transformations maximize space through floating vanities, large-format tiles, corner showers, and recessed storage that create a spacious feel without relocating plumbing.
- Luxury bathroom renovations require proper planning and licensed contractors to install features like heated floors, walk-in showers with custom tile, and high-end vanities that take 6–10 weeks to complete.
- Common renovation mistakes like inadequate ventilation, ignoring waterproofing membranes, and poor electrical planning can be prevented by documenting the process and learning from others’ experiences before starting your project.
- Documenting your bathroom renovation with consistent photos, expense tracking, and process notes creates a valuable resource for future resale, warranty claims, and inspiring other homeowners.
Why Before and After Photos Are Essential for Planning Your Bathroom Renovation
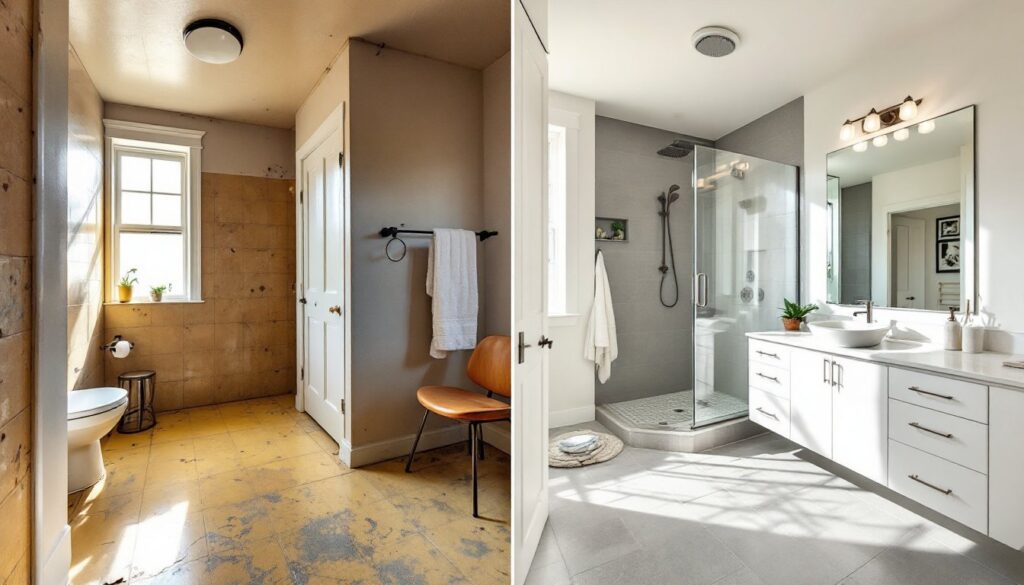
Before-and-after photos do more than inspire, they educate. A good transformation shot reveals layout decisions, material choices, and spatial problem-solving in ways a written description can’t match. Homeowners can see how moving a toilet twelve inches opens up a narrow floor plan, or how swapping a tub for a walk-in shower creates aging-in-place functionality.
These images also set realistic expectations. A dramatic makeover might look like a total gut job, but closer inspection often shows the original footprint stayed intact to avoid moving plumbing. That’s the difference between a $8,000 cosmetic refresh and a $25,000 structural overhaul. Understanding what changed, and what didn’t, helps DIYers and budget-conscious renovators prioritize.
Documentation also exposes common pitfalls. A stunning after photo paired with a candid description of the tiling mistake that added three days and $400 in replacement materials? That’s gold. Real projects include setbacks: wrong measurements, delayed shipments, surprise rot behind the drywall. Seeing those struggles acknowledged makes the wins feel earned and the process less intimidating.
Budget-Friendly Bathroom Makeovers That Deliver Stunning Results
Big impact doesn’t always require a big check. Budget bathroom renovations typically focus on surface-level updates that mask dated finishes without touching plumbing or electrical.
Paint and Refinishing: A fresh coat of moisture-resistant paint (look for products rated for high-humidity environments) transforms dingy walls. Pair that with refinished cabinets, sanding, priming with a bonding primer like Zinsser B-I-N, and two coats of semi-gloss enamel, and the space feels brand new. Cost: under $300 for materials.
Affordable Tile Alternatives: Peel-and-stick vinyl tiles have come a long way. Modern LVT (luxury vinyl tile) with a wear layer of at least 12 mil can handle bathroom moisture and foot traffic. It’s not as durable as ceramic, but for a powder room or rental update, it’s a solid play at $2–$4 per square foot installed.
Fixture Swaps: Replacing a builder-grade vanity faucet, shower head, and cabinet hardware takes about two hours and costs $150–$300. Chrome, brushed nickel, or matte black finishes instantly update the room’s style. Don’t forget the toilet seat, a soft-close model eliminates that midnight slam and costs under $40.
Lighting Upgrades: Swapping out a single overhead dome light for a three-bulb vanity fixture improves task lighting and changes the entire vibe. If the existing electrical box is rated for the new fixture’s weight, it’s a straightforward DIY. Otherwise, call a licensed electrician to install a proper mounting bracket.
Budget makeovers shine when paired with smart renovation planning, focusing dollars where they’re most visible.
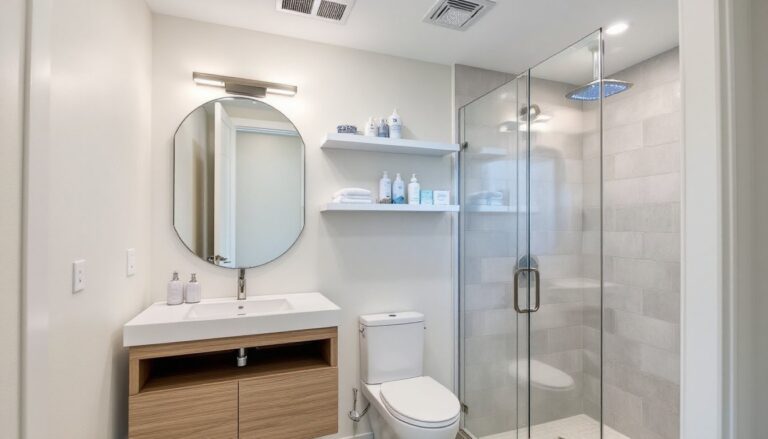
Small Bathroom Transformations: Maximizing Space and Style
Small bathrooms punish bad decisions and reward clever ones. Every inch counts, and before-and-after photos of compact spaces often reveal layout tricks that feel counterintuitive.
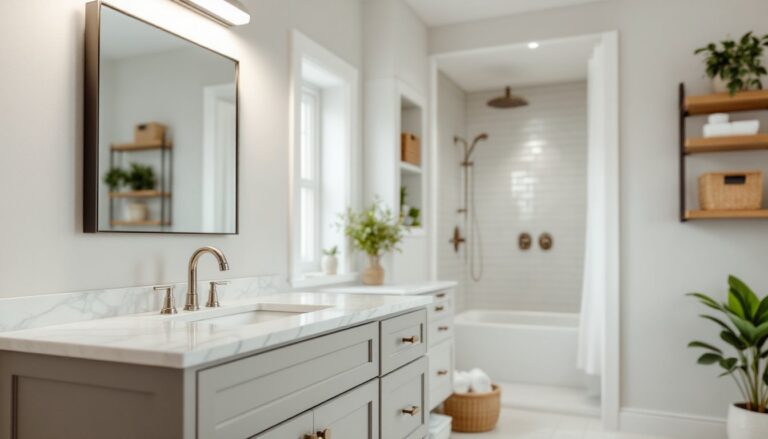
Floating Vanities: Wall-mounted vanities expose floor space, making a 5×7-foot bathroom feel less cramped. They also simplify cleaning. Install blocking (horizontal 2×6 or 2×8 boards) between studs during the rough-in stage to support the vanity’s weight, especially important if it’s a stone countertop.
Corner Showers and Neo-Angle Doors: Replacing a tub with a 36-inch corner shower unit frees up floor space without relocating the drain. Neo-angle shower doors (the ones with an angled front) reduce the door’s swing radius, a big win in tight quarters.
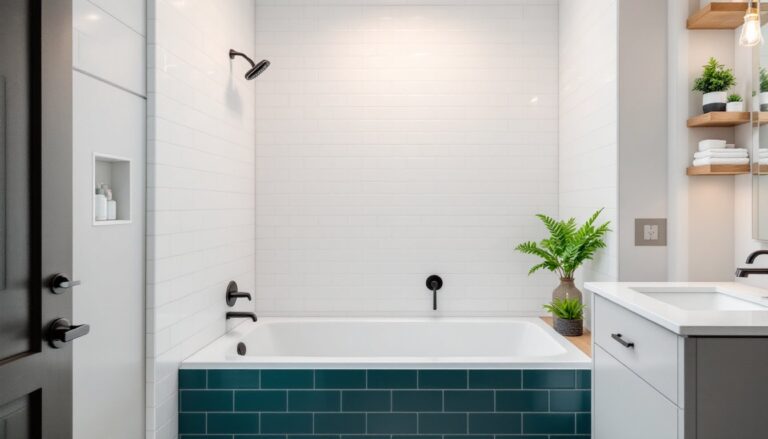
Large-Format Tiles: Fewer grout lines mean less visual clutter. A 12×24-inch tile on walls and floors creates a streamlined look. Just be sure to use a large-notch trowel (at least 1/2 inch) and back-butter each tile to ensure full adhesion.
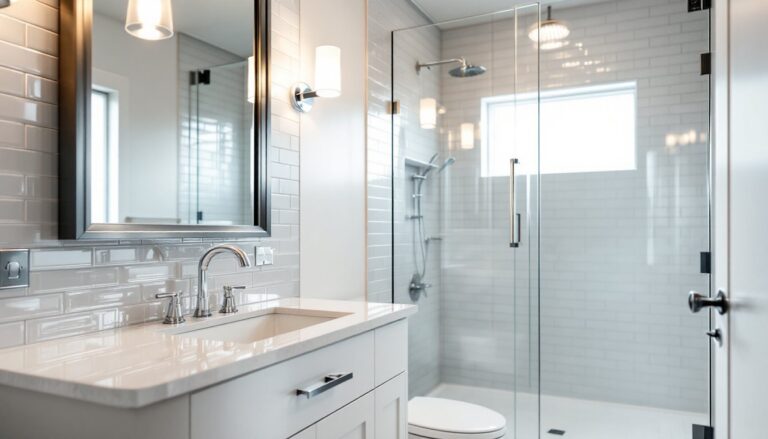
Mirrors and Glass: A full-width mirror above the vanity amplifies light. Frameless glass shower enclosures eliminate the visual barrier of a curtain or frosted door. Both tricks are staples of small-space design featured on sites like Remodelista, where every design choice is scrutinized for function and form.
Recessed Storage: Cutting into the wall cavity between studs for a recessed medicine cabinet or shampoo niche adds storage without eating floor space. Check for plumbing, electrical, and HVAC runs before cutting. A stud finder and a non-contact voltage tester are your friends here.
Luxury Bathroom Renovations: High-End Upgrades Worth the Investment
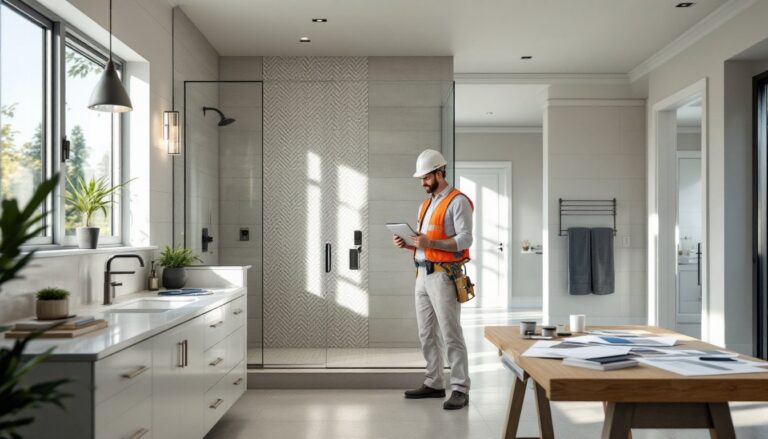
Luxury bathroom renovations often involve structural changes, premium materials, and systems that improve comfort and resale value. These projects require permits, licensed contractors, and realistic timelines, plan on 6–10 weeks for a full gut and rebuild.
Heated Floors: Radiant floor heating systems, especially electric mat systems like Schluter DITRA-HEAT, install under tile and turn cold mornings into a spa experience. Expect to pay $10–$15 per square foot installed. They’re controlled by a programmable thermostat and draw minimal power when sized correctly.
Walk-In Showers with Custom Tile: Curbless showers with linear drains offer accessibility and a sleek look. They require careful slope management, 1/4 inch per foot toward the drain, and a waterproofing membrane like Schluter KERDI or RedGard. Custom mosaic accent walls or large-format porcelain slabs elevate the design.
Freestanding Tubs: A sculptural freestanding tub (cast iron, acrylic, or stone resin) becomes the room’s focal point. Floor-mounted tub fillers require rough-in plumbing through the floor joists, so this isn’t a surface-level swap. Budget $1,500–$5,000 for the tub, $400–$800 for the filler, and additional plumbing labor.
High-End Vanities and Countertops: Custom cabinetry with soft-close drawers, dovetail joinery, and premium finishes runs $3,000–$10,000. Pair it with a quartz or marble countertop (quartz is more forgiving for bathrooms due to its non-porous surface) and an undermount sink for a clean, high-end look.
Smart Features: Bluetooth exhaust fans, backlit LED mirrors, digital shower controls, and heated towel racks add comfort. Many of these require dedicated circuits, work with an electrician to ensure compliance with NEC Article 210 (branch circuits) and local codes.
Projects at this level benefit from applying proven renovation strategies to avoid costly missteps.
Common Bathroom Renovation Mistakes to Avoid (Lessons from Real Projects)
Before-and-after photos rarely show the mistakes, but forums, blogs like Young House Love, and candid contractor interviews reveal them.
Inadequate Ventilation: Skipping or undersizing the exhaust fan invites mold. Bathrooms need a fan rated for the room’s cubic footage, calculate by multiplying length × width × height, then dividing by 7.5 to get the required CFM (cubic feet per minute). A 5×8-foot bathroom with an 8-foot ceiling needs roughly 43 CFM. Install fans vented to the exterior, never into the attic.
Ignoring Water Intrusion: Tile looks waterproof. It’s not. The real barrier is the underlayment, cement board is moisture-resistant, but it’s not waterproof. Always apply a membrane (sheet or liquid) before tiling wet areas. Skipping this step leads to rot, mold, and expensive tear-outs.
Wrong Tile for the Job: Polished marble looks stunning but becomes a slip hazard on shower floors. Use textured or matte-finish tiles with a COF (coefficient of friction) rating above 0.60 for wet areas.
Poor Planning of Electrical and Plumbing: Moving a toilet means relocating a 3-inch drain line and possibly a vent stack, jobs that often require opening walls and ceilings. Same goes for relocating a shower valve. If the goal is budget control, design around existing rough-in locations.
Underestimating Prep Work: Tile is only as good as the surface beneath it. Uneven walls, unlevel floors, and poorly secured substrates telegraph through the finish. Spend time shimming, leveling, and floating surfaces before the pretty stuff goes up.
Choosing Style Over Function: A vessel sink looks great in photos but can be impractical for kids or guests who splash. A rainfall shower head is luxurious but lacks the pressure for rinsing shampoo. Balance aesthetics with daily use.
First-time renovators often overlook these details, which is why reviewing beginner-focused renovation guides can save thousands in do-overs.
How to Document Your Own Bathroom Renovation Journey
Creating a solid before-and-after record benefits future homeowners, helps track expenses, and, if shared, can inspire others.
Take Consistent Photos: Shoot from the same angles before, during, and after. A wide-angle lens (or smartphone panorama mode) captures the full space. Document the mess: open walls, failed attempts, and problem-solving moments make the transformation feel real.
Log Expenses and Decisions: Use a spreadsheet or renovation app to track every purchase, including date, supplier, product name, and cost. This becomes invaluable for warranty claims, insurance, or future resale disclosures.
Capture the Process: Photos of rough-in plumbing, electrical runs, and blocking between studs are useful if walls ever need to be opened again. Mark stud locations on the subfloor before laying tile, it’s a lifesaver for future towel bar or grab bar installs.
Write Down What Worked (and What Didn’t): A simple project journal noting “should’ve rented the tile wet saw instead of buying a cheap one” or “KERDI membrane was easier to work with than RedGard” helps refine skills for the next project.
Share Thoughtfully: Platforms like Houzz allow homeowners to upload photos, list materials, and connect with others tackling similar projects. A well-documented renovation can become a portfolio piece or a teaching tool.
For those planning to document extensively, keeping a running list of useful renovation tips and tools ensures nothing gets forgotten mid-project.
Conclusion
Bathroom renovations deliver some of the highest returns in home improvement, not just in resale value, but in daily quality of life. Before-and-after photos aren’t just pretty comparisons: they’re blueprints for what’s possible when planning, materials, and execution come together. Whether the goal is a $500 refresh or a $30,000 luxury remodel, the lessons are the same: respect the prep work, plan around existing systems when possible, and don’t skip the unsexy stuff like ventilation and waterproofing. Every successful transformation starts with a realistic plan and ends with a space that works harder and looks better.