Table of Contents
ToggleSan Francisco bathroom renovations aren’t like projects in other cities. Older building stock, seismic safety codes, and strict permitting rules mean homeowners can’t just open a wall and start swapping fixtures. Add in high labor costs and limited space, and what seems like a straightforward cosmetic upgrade can quickly become a months-long ordeal. This guide walks through the permitting process, realistic cost breakdowns, design strategies for compact layouts, contractor selection, and which tasks a homeowner can reasonably handle themselves in 2026.
Key Takeaways
- San Francisco bathroom renovations require permits for most work beyond cosmetic finishes due to strict building codes, seismic safety requirements, and the prevalence of outdated infrastructure in older homes.
- Budget $35,000–$65,000 for mid-range bathroom renovations and plan for 6–10 weeks, as labor costs run 20–40% higher than national averages and constitute 50–60% of your total project budget.
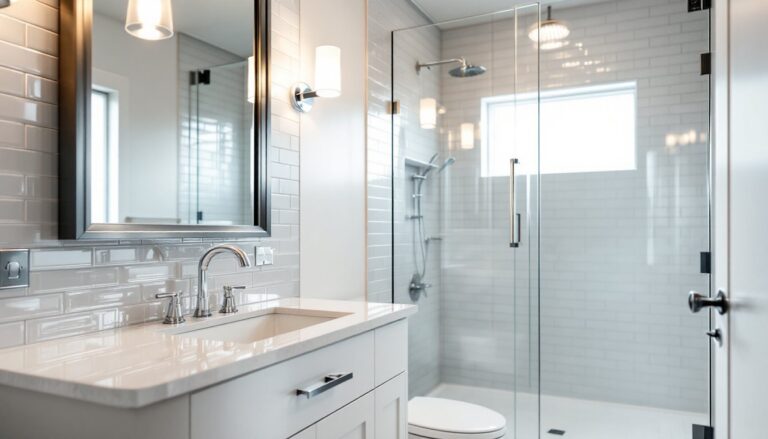
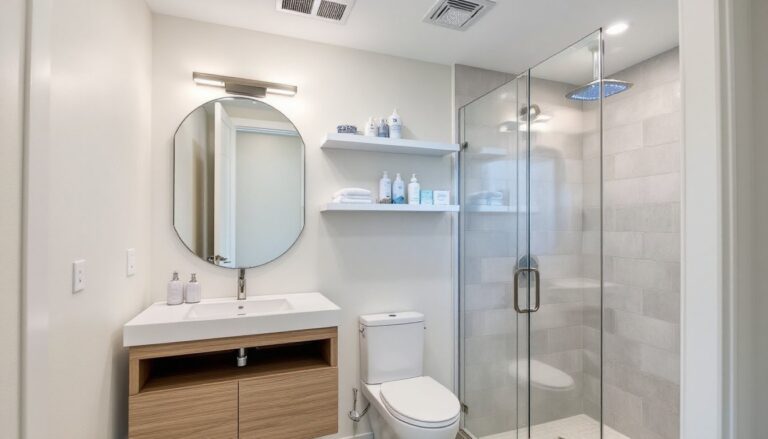
- Space optimization strategies like wall-hung fixtures, curbless showers, and large-format tile make compact San Francisco bathrooms feel larger while improving functionality and modern aesthetics.
- Verify contractor credentials through the California Contractor State License Board, get three written bids, and avoid lowball estimates that may indicate unlicensed workers or corner-cutting.
- Prioritize professional help for electrical, plumbing relocation, structural work, and tile waterproofing, while DIY-friendly tasks like demolition, painting, and basic fixture installation can save labor costs if done correctly.
- Set aside 15–20% of your budget as a contingency for hidden costs like mold remediation, structural repairs, and lead/asbestos abatement, which are common in pre-1978 San Francisco homes.
Why San Francisco Bathroom Renovations Require Special Planning
San Francisco’s housing stock skews older, many homes were built before 1950, with galvanized steel plumbing, knob-and-tube wiring, and lath-and-plaster walls. Opening a wall to relocate a toilet or shower often reveals corroded pipes, outdated electrical panels, or structural framing that doesn’t meet current seismic bracing standards.
Seismic requirements are strict under the California Residential Code (CRC). Any work that involves structural alterations, removing or adding walls, relocating heavy fixtures like cast-iron tubs, may trigger requirements for shear wall reinforcement or anchor bolt upgrades. This isn’t cosmetic: it’s mandatory.
Space constraints are another factor. The typical San Francisco bathroom is 5×7 feet or smaller, especially in Edwardian flats and Victorians. Relocating plumbing or enlarging the footprint often means stealing space from adjacent closets or hallways, which complicates framing and adds costs.
Lead and asbestos are common in pre-1978 homes. Disturbing old tile, joint compound, or pipe insulation can release hazardous materials. Professional abatement isn’t optional if testing comes back positive, it’s required by California’s Division of Occupational Safety and Health (Cal/OSHA). Budget $1,500–$5,000 for abatement depending on scope.
Understanding Permit Requirements and Building Codes
San Francisco’s Department of Building Inspection (DBI) requires permits for nearly all bathroom work beyond surface finishes. Cosmetic updates, painting, replacing a vanity, swapping a toilet with the same drain location, don’t need a permit. Everything else does.
Electrical work falls under the National Electrical Code (NEC). Adding or relocating outlets, upgrading circuits, or installing heated floors requires a permit and licensed electrician. All bathroom outlets must be GFCI-protected and on a dedicated 20-amp circuit if serving high-draw appliances like towel warmers.
Plumbing permits are needed for relocating fixtures, replacing supply or drain lines, or installing new vents. San Francisco requires licensed plumbers for all gas and water work. Inspections occur at rough-in (before drywall) and final stages. Expect 2–4 weeks for plan review and permit issuance.
Structural alterations, removing walls, adding skylights, or reinforcing joists for a heavier tub, require engineered drawings and structural plan review. For homes in seismically active zones (all of SF), essential renovation tips include hiring a structural engineer early to avoid mid-project design changes.
Ventilation must meet IRC standards: either a window with at least 3 square feet of openable area or a mechanical exhaust fan rated for 50 CFM (cubic feet per minute) vented to the exterior. Recirculating fans don’t meet code.
Average Costs for Bathroom Renovations in San Francisco
San Francisco’s labor and material costs run 20–40% higher than national averages. A mid-range bathroom renovation averages $35,000–$65,000 in 2026, while high-end remodels can reach $80,000–$120,000 or more.
Labor is the biggest cost driver. Licensed plumbers charge $150–$250 per hour: electricians run $120–$200: general contractors typically add 15–25% markup on subcontractor work plus their own hourly rate ($80–$150). For a full gut renovation, labor often accounts for 50–60% of the total budget.
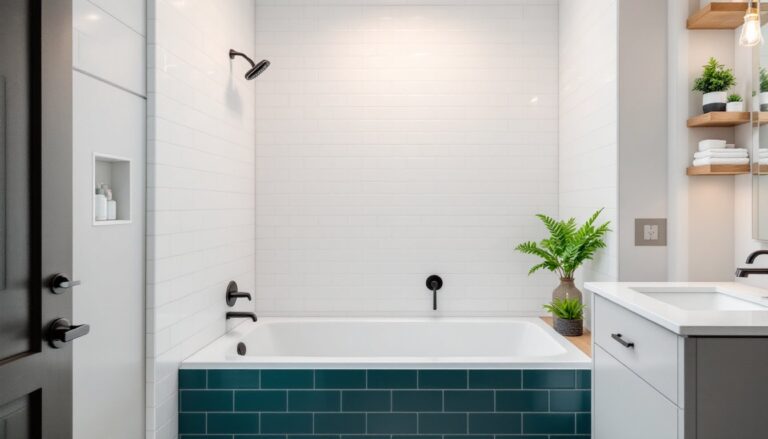
Materials vary widely. Porcelain tile runs $3–$12 per square foot: natural stone (marble, travertine) starts at $8–$20. A standard alcove tub (60×32 inches) costs $300–$800: walk-in showers with frameless glass doors and tile run $4,000–$9,000 installed. Vanities range from $500 for a basic 24-inch unit to $3,500+ for custom cabinetry.
Permits and fees add $1,500–$4,000 depending on scope. Plan review, inspection fees, and sewer lateral compliance (if replacing the toilet drain) all contribute. Using cost estimators from sites like HomeAdvisor can provide ballpark figures, but always get three local bids.
Hidden costs include structural repairs, mold remediation (common in SF’s damp climate), and upgrading undersized drain stacks. Set aside 15–20% of your budget as a contingency. Older homes almost always reveal surprises once demolition starts.
Design Trends and Space Optimization for SF Bathrooms
San Francisco bathrooms demand efficient layouts. Wall-hung toilets and vanities free up floor space and make small rooms feel larger. Duravit, Kohler, and Toto all make wall-mounted models: just ensure joists are reinforced with 2×6 or 2×8 blocking to support the carrier frame.
Corner sinks and compact vanities (18–24 inches wide) work well in powder rooms. Pedestal sinks save space but sacrifice storage, consider a small wall-mounted cabinet above or beside the sink instead.
Curbless showers are trending for accessibility and modern aesthetics. They require careful waterproofing (use a bonded membrane like Schluter KERDI or RedGard) and proper slope (minimum 1/4 inch per foot toward the linear drain). Subfloor must often be lowered 3–4 inches to accommodate the drain assembly.
Natural light is scarce in narrow SF flats. If adding a window isn’t feasible, install a skylight or solatube. Both require roof penetration and flashing details: budget $1,500–$4,000 installed. LED recessed lighting (3–4 inch cans) provides even task light: use dimmable fixtures for flexibility.
Tile choices affect both look and budget. Large-format porcelain (12×24 or larger) reduces grout lines and feels more spacious. White subway tile remains popular but consider textured or patterned options for accent walls. For inspiration on cohesive design, browse curated bathroom remodels that balance function and style.
Storage solutions include recessed medicine cabinets (fit between studs), floating shelves, and built-in niches in shower walls. Niches should be framed during rough-in and waterproofed with the rest of the shower.
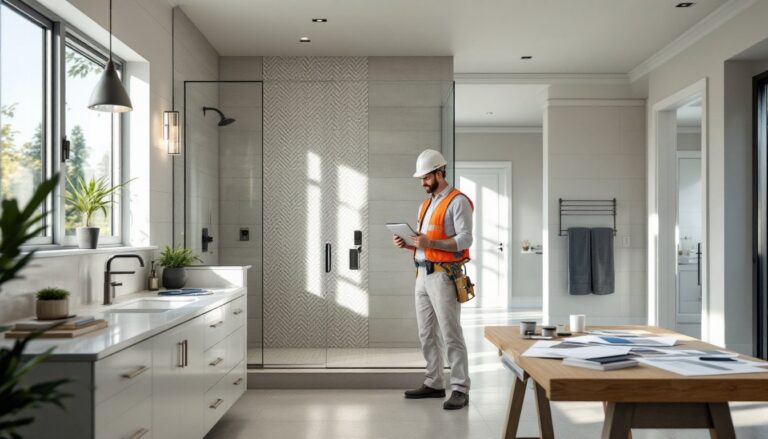
Choosing the Right Contractors and Managing Your Timeline
Finding a reliable contractor in San Francisco’s tight labor market takes legwork. Start by verifying California Contractor State License Board (CSLB) credentials. General contractors need a B license: specialty contractors (plumbers, electricians) carry C-36 or C-10 licenses. Check for active status, bond coverage, and workers’ comp insurance.
Get three written bids that itemize labor, materials, permits, and timeline. Beware of lowball estimates, they often indicate unlicensed workers or plans to cut corners. References matter: ask to visit completed projects or speak with past clients.
Contracts should specify payment schedule (avoid paying more than 10% upfront per California law), change order process, lien waivers, and cleanup responsibilities. Include a detailed scope of work: “install Kohler K-1123 tub with Moen Align fixtures” is better than “install tub and faucet.”
Timelines for a full bathroom renovation run 6–10 weeks in San Francisco, longer if permits are delayed or materials backordered. Demo takes 1–3 days: rough plumbing and electrical 3–5 days: inspection and approval 1–2 weeks: tile and finish work 2–3 weeks: final fixtures and paint 3–5 days.
Communication prevents most disputes. Schedule weekly check-ins, preferably on-site. Use a shared project management app (Buildertrend, Houzz Pro) to track progress, photos, and invoices. Searching for top-reviewed bathroom contractors can streamline the vetting process.
Red flags include contractors who refuse to pull permits, demand large cash deposits, or lack insurance documentation. Walk away from anyone pressuring you to skip inspections.
DIY vs. Professional: What You Can Tackle Yourself
Some bathroom tasks are DIY-friendly: others require licensed pros or permits. Demolition is straightforward if you’re careful, rent a 10-yard dumpster ($400–$600), wear safety goggles, dust mask, and work gloves, and shut off water and power before swinging a sledgehammer. Bag and dispose of debris properly: asbestos tile requires professional handling.
Painting and caulking are easy wins. Use mildew-resistant primer (Zinsser Mold Killing Primer or similar) and satin or semi-gloss finish paint for moisture resistance. Re-caulk tubs and showers with 100% silicone or urethane caulk, not acrylic latex.
Installing a vanity or toilet is manageable with basic plumbing skills. Toilets use a wax ring or newer foam gasket: tighten closet bolts evenly to avoid cracking the base. Vanities require connecting P-trap and supply lines, use flexible braided hoses and Teflon tape on threaded fittings. But if you’re relocating drains, hire a plumber.
Tile work has a learning curve. Successful DIYers practice layouts, use a wet saw for cuts, and apply thinset mortar in small sections. Waterproofing (membrane application, inside corners, penetrations) is critical, mistakes lead to leaks and mold. A first-timer might handle a small floor: walls and shower pans are best left to pros.
Electrical and plumbing beyond fixture swaps require permits and usually pros. San Francisco inspectors will fail unpermitted work, and insurance may deny claims if unlicensed work caused damage. Applying best renovation tips means knowing when to call in expertise.
Tool alternatives help DIYers save. A circular saw with a guide can rip plywood or cut tile backer: a miter saw is faster for trim but not essential. Rent specialty tools (tile saws, rotary hammers) from Home Depot or United Rentals rather than buying.
Conclusion
Bathroom renovations in San Francisco demand more planning and budget than most other cities, but the payoff, in home value, functionality, and daily comfort, is worth it. Understand permit requirements upfront, budget realistically for labor and surprises, design for your specific space constraints, vet contractors carefully, and know which tasks you can handle yourself. Start with a clear plan, and don’t skip the prep work.