Table of Contents
ToggleA tiny bathroom redo can feel like solving a 3D puzzle with plumbing inside it. Every inch matters, every fixture choice ripples through the layout, and one wrong call (say, a vanity that blocks the door swing) means tearing it back out. The good news? Small bathrooms are also the cheapest rooms to renovate, the fastest to finish, and the most forgiving for DIYers. This guide walks through seven smart, practical ideas to transform a cramped bath in 2026, from budget planning to weekend upgrades and the mistakes worth dodging.
Key Takeaways
- A tiny bathroom redo can range from $500–$2,500 for a cosmetic refresh to $10,000+ for a full gut renovation, making it the most affordable room to update while offering fast results for DIYers.
- Maximize space by installing floating sinks, curbless showers, compact toilets, and pocket doors—these fixture choices can reclaim 9+ square feet of usable floor space.
- Light colors, large-format tile, and strategic layered lighting (ceiling fixture plus mirror-flanking sconces) make small bathrooms feel significantly larger without expanding square footage.
- Go vertical with storage using recessed medicine cabinets, over-toilet shelving, shower niches, and toe-kick drawers to maximize every inch without cluttering the floor.
- High-impact weekend DIY upgrades like repainting, re-caulking, swapping vanity faucets, and installing new mirrors can refresh a tiny bathroom in 6–8 hours with measurable results.
- Avoid costly mistakes by prioritizing moisture barriers behind tile, installing proper exhaust ventilation (CFM ≥ square footage), resizing fixtures to scale, and hiring licensed electricians for GFCI outlet work near water.
Planning Your Tiny Bathroom Redo on a Budget
Before swinging a hammer, a homeowner needs a number. Most small bathroom renovation ideas live or die by a realistic budget, and a 40-square-foot bath can run anywhere from $3,000 for a cosmetic refresh to $15,000+ for a full gut job, depending on region and finish level.
A quick breakdown:
- Cosmetic refresh (paint, fixtures, mirror, hardware): $500–$2,500
- Mid-range remodel (new vanity, toilet, tile floor): $4,000–$8,000
- Full gut (move plumbing, retile shower, new subfloor): $10,000+
Moving plumbing or load-bearing walls typically triggers a permit under the IRC (International Residential Code), and rules vary by jurisdiction. Cost guides like those from home renovation pricing tools are useful for sanity-checking quotes. Set aside 15% contingency, because demo always reveals something.
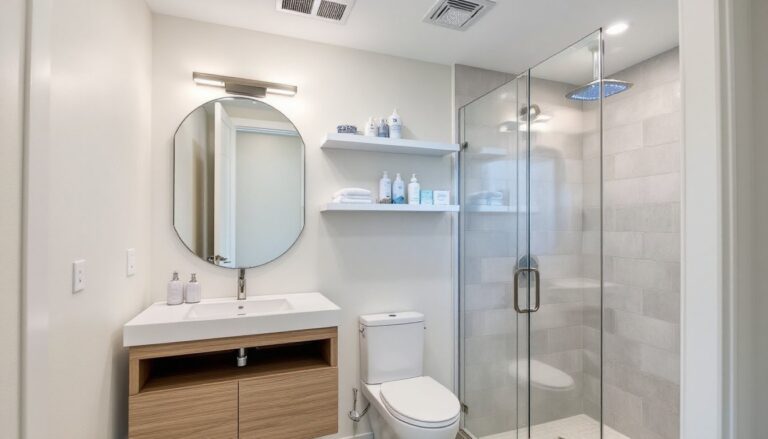
Space-Saving Layout and Fixture Choices
In a tiny bathroom, fixture footprint is everything. Standard toilets need 21 inches of clearance in front per IRC 307.1, and a 30-inch vanity can swallow a third of the floor in a 5×7 bath.
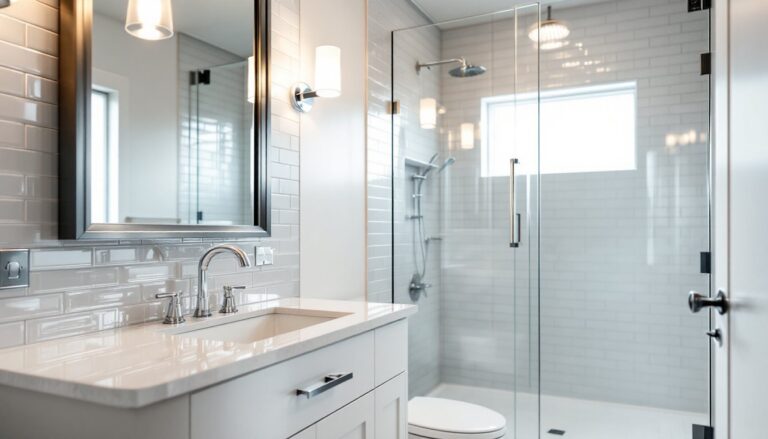
Swapping a tub for a curbless shower (32×32 or 36×36) opens up sightlines and meets aging-in-place guidelines. Compact round-front toilets save about 2 inches over elongated models. Pocket doors reclaim the 9 square feet a swinging door steals. For inspiration on micro-layouts, the small-space coverage at apartment-sized makeovers is worth a scroll before finalizing a floor plan.
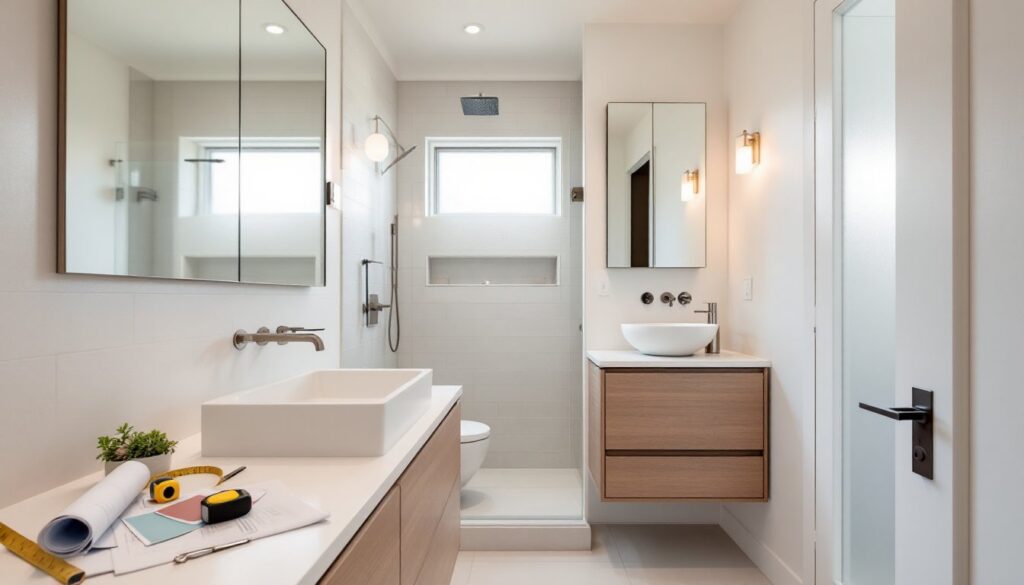
Swapping Vanities for Wall-Mounted Sinks
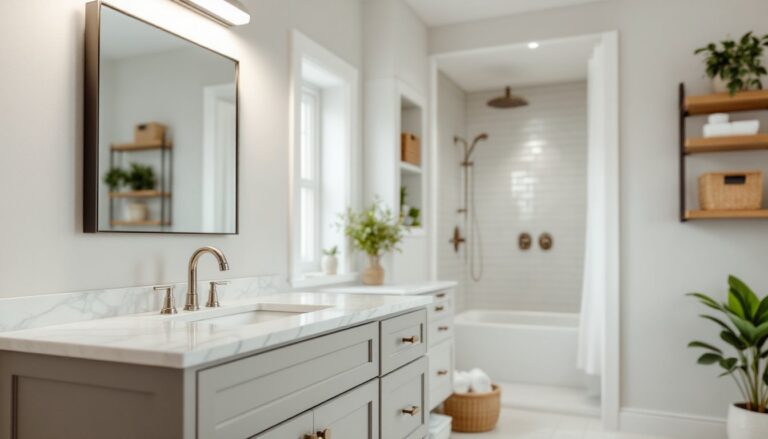
Wall-mounted (or “floating”) sinks free up floor space visually and physically. A standard wall-hung sink projects 16–18 inches versus a 21-inch vanity, and the exposed floor underneath tricks the eye into reading the room as larger.
Installation requires solid blocking between studs, typically 2×8 lumber anchored at 32–34 inches off the finished floor. A pedestal sink works too, but storage disappears. Pair a floating sink with a recessed medicine cabinet to claw back the lost cabinet space.
Color, Light, and Materials That Make Small Bathrooms Feel Bigger
Light colors reflect more lumens, full stop. A semi-gloss or satin finish in soft white, pale greige, or warm off-white bounces light around and resists moisture. One gallon of bathroom-rated paint covers roughly 350–400 square feet, plenty for a small bath with two coats.
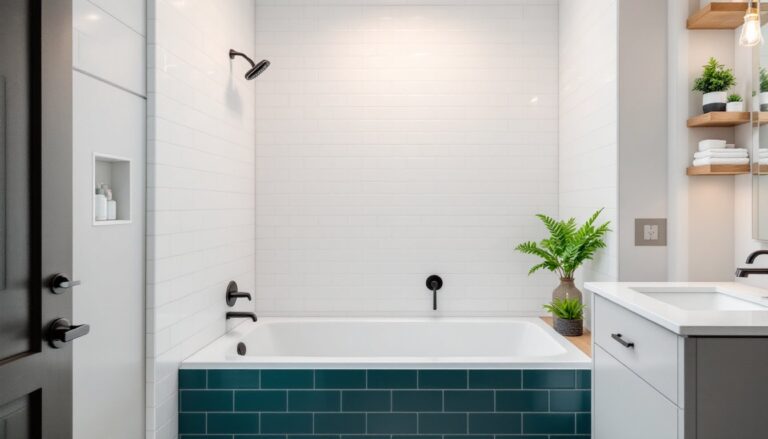
Large-format tile (12×24 or larger) cuts grout lines and visually stretches walls. Run floor tile diagonally or carry the same tile into a curbless shower to erase the visual “break.” Curated material picks on sites like bathroom remodel inspiration lean toward this trick for a reason.
Lighting matters as much as paint. Layer a ceiling fixture (minimum 80 CRI, 2700–3000K) with sconces flanking the mirror at eye level. And add a mirror that’s larger than the vanity, it nearly doubles perceived depth.
Clever Storage Solutions for Every Square Inch
Storage is where most bathroom remodel ideas for small bathrooms either shine or flop. The trick is going vertical and into the walls, not out into the floor.
Options worth considering:
- Recessed medicine cabinets set between studs (3.5 inches deep in a standard 2×4 wall) add storage without bumping into the room.
- Over-toilet shelving uses the dead air above the tank, typically 24–30 inches of vertical real estate.
- Niche shelves built into shower walls during tile prep hold shampoo without a hanging caddy.
- Toe-kick drawers under a vanity reclaim 4–6 inches usually wasted on a kickplate.
For older homes with cramped baths, walking through a Pittsburgh bathroom renovation guide shows how pre-1960s layouts get reworked around plumbing chases. Similar tricks apply to any tight floor plan. Homeowners with humidity-prone baths (think coastal areas covered in a Long Island renovation walkthrough) should spec marine-grade plywood or PVC for any built-ins.
DIY Upgrades You Can Tackle in a Weekend
Not every small bathroom remodel ideas list needs a contractor. Plenty of high-impact upgrades fit in a Saturday-Sunday window:
- Repaint walls and ceiling with mildew-resistant paint. Prep with TSP substitute, sand glossy areas, prime stains. Total: 6–8 hours.
- Swap the vanity faucet and showerhead. A basin wrench handles the tight nuts under the sink. Shut the angle stops first.
- Replace the toilet seat and flapper for instant freshness and a 10–20% water savings if the flapper was leaking.
- Re-caulk the tub and sink with 100% silicone (mildew-resistant). Remove old caulk fully, tape clean lines, smooth with a wet finger.
- Install a new mirror and hardware, towel bars, hooks, TP holder. Use proper anchors rated for tile if drilling into a wall surround.
Safety basics: wear nitrile gloves and safety glasses when handling caulk remover or paint stripper, and ventilate hard. Browsing before-and-after transformations helps calibrate what’s actually achievable in a weekend versus what needs a full project window. Curious DIYers eyeing bigger scope can compare notes with a Queens bathroom upgrade guide before deciding what to outsource.
Common Mistakes to Avoid During a Small Bathroom Remodel
Small spaces punish sloppy planning. A few mistakes show up over and over:
- Skipping the moisture barrier. Behind shower tile, a proper waterproofing membrane (sheet or liquid-applied) is non-negotiable. Cement board alone is not waterproof.
- Ignoring ventilation. Code typically requires an exhaust fan rated for the room’s cubic footage (CFM ≥ square footage for baths under 100 sq ft) or an operable window. Mold loves a fan-less bath.
- Oversized fixtures. A 60-inch vanity in a 5×7 bath isn’t bold, it’s a tripping hazard.
- DIYing electrical near water. GFCI outlets within 6 feet of a sink are required by the NEC, and rough-in mistakes can fail inspection or, worse, cause a shock. Hire a licensed electrician for new circuits.
- Hiring the wrong help. Vetting matters: a solid contractor hiring checklist can save thousands. Regional guides like an Oakville renovation breakdown also flag local permit quirks.
And one last thing: don’t pick finishes before the layout is locked. Tile choices should follow the floor plan, not the other way around.